

Commercial Real Estate
Commercial Land Drone Photography: Give Buyers a Clear Sense of Place
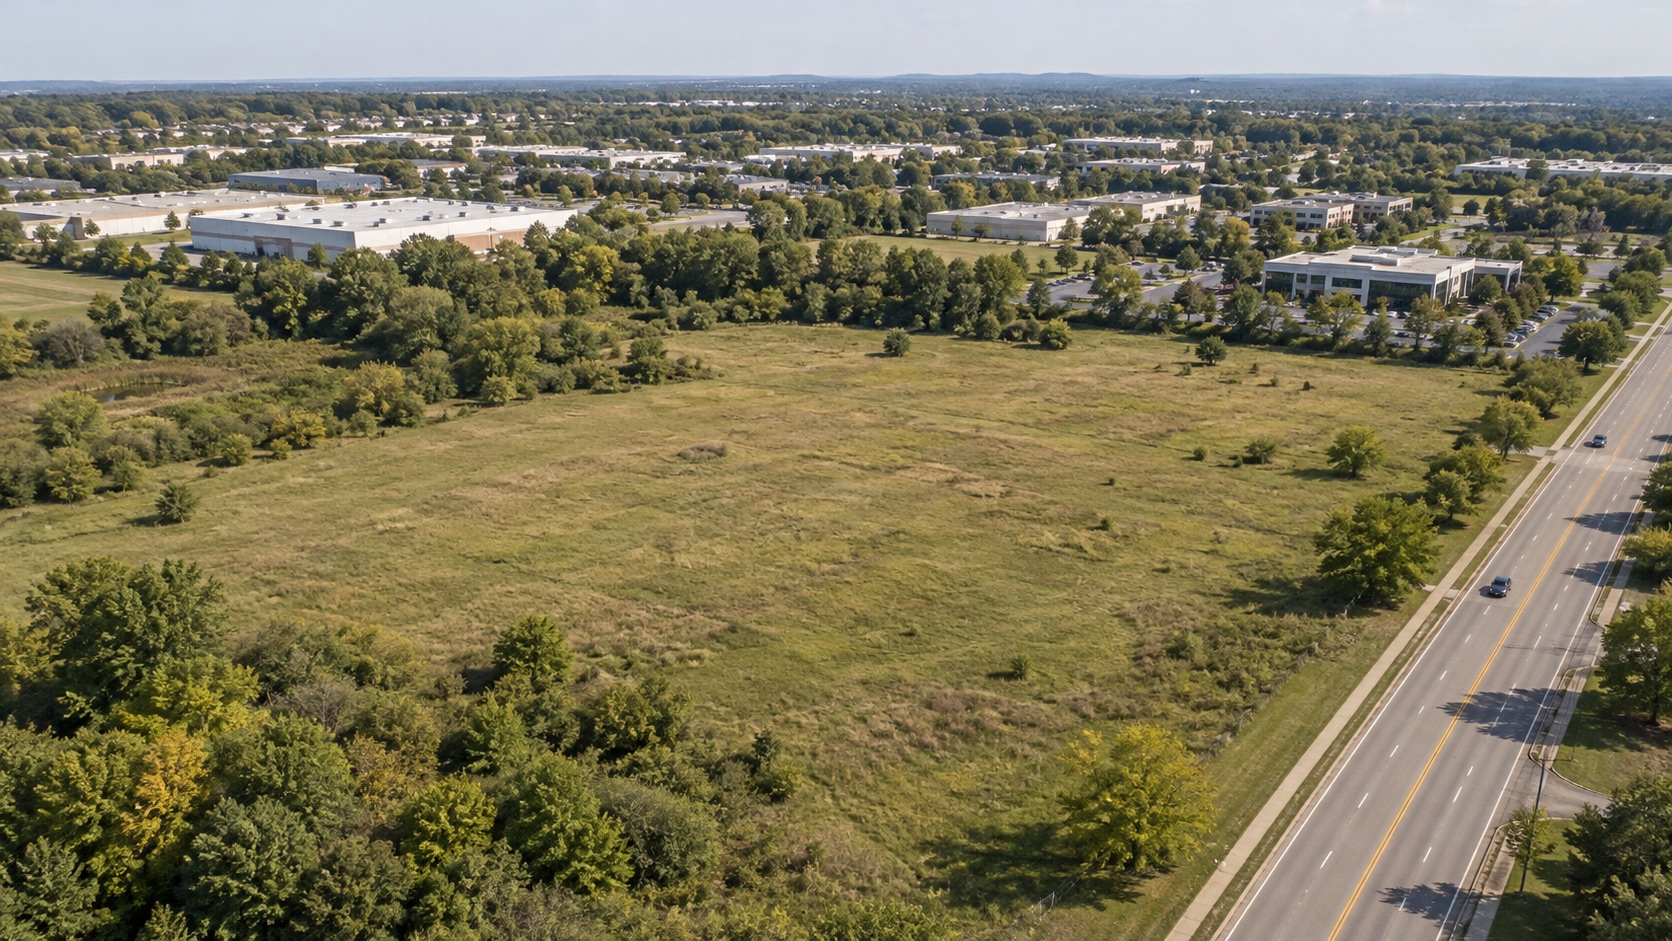
A broker sends a buyer three photographs of open land. Each is sharp, sunlit, and attractive. Yet the buyer cannot tell which road appears in the foreground, where the visible entrance sits, or how the open area relates to the buildings beyond it. The pictures show land without establishing a place.
Commercial land drone photography becomes more useful when it gives the reader that orientation. A broad view, a few carefully connected details, and separately presented property facts can create a clear introduction. The assignment is to make the setting understandable while keeping the photograph’s contribution distinct from information supplied by the property team.
Begin with an unmarked overview
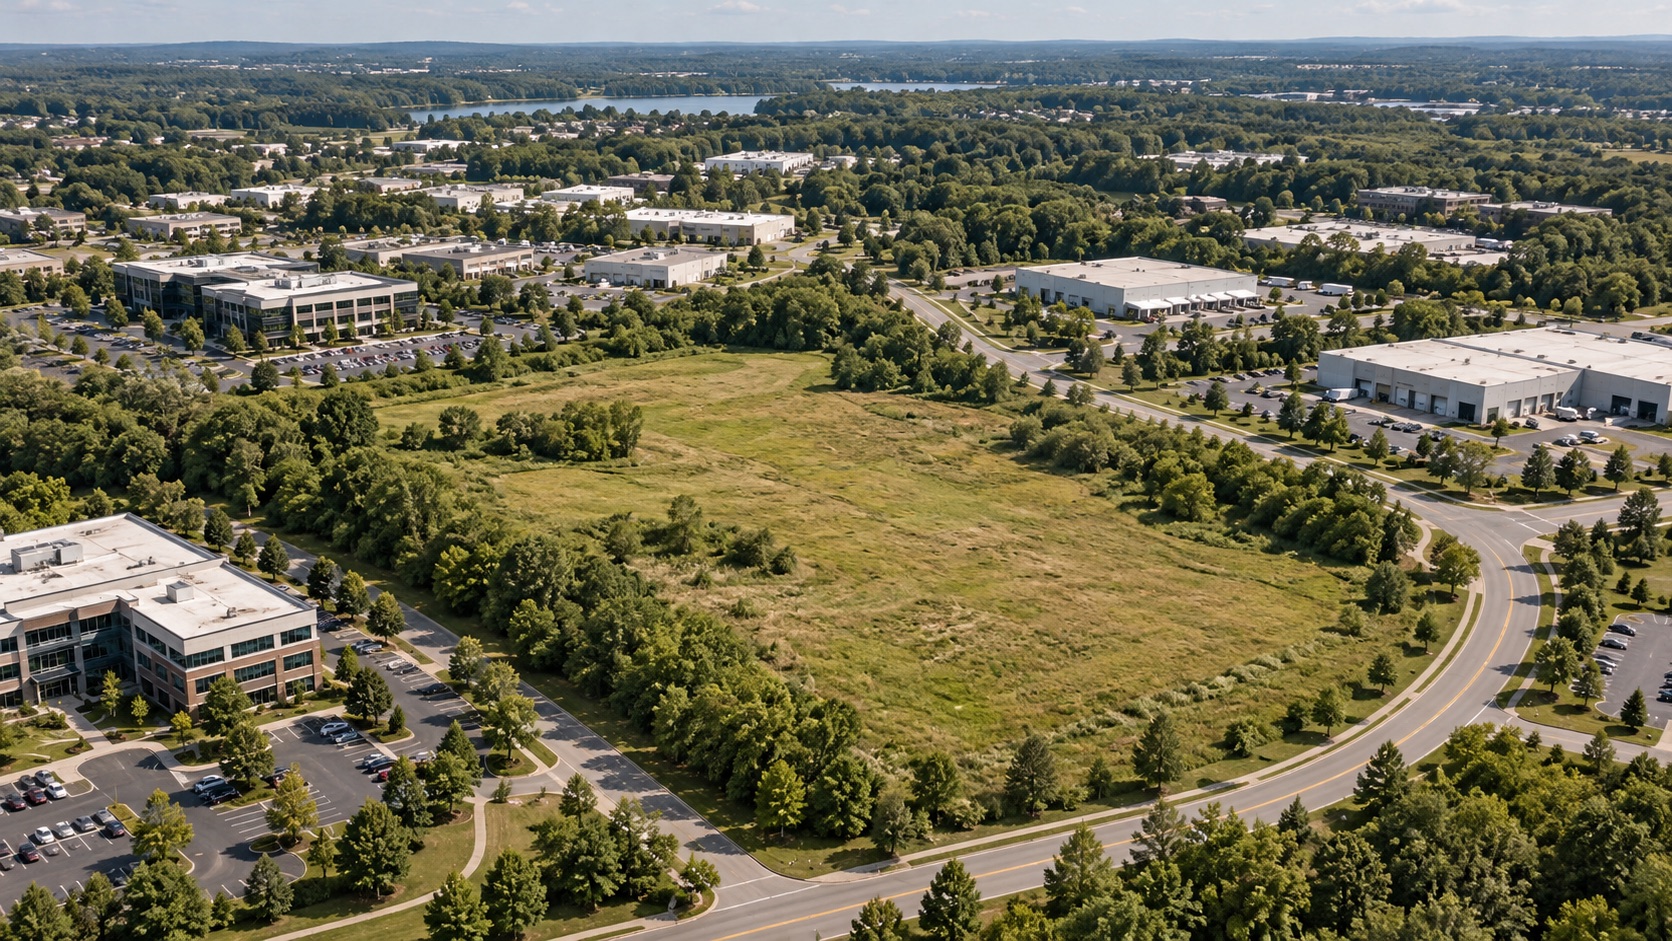
Choose an opening photograph that keeps the subject area prominent and includes recognizable surroundings. A road intersection, neighboring building, or distinctive stand of trees can help the reader find their bearings. Include enough context to explain the setting without making the land itself a small patch in the distance.
Keep this first view unmarked. Before adding labels or graphics, assess whether the photograph works as a photograph: the intended subject should be easy to locate, the direction of view should make sense, and important relationships should remain visible at the size used in the listing.
Do not trace a fence, tree line, or change in vegetation simply because it looks like an edge. Such features can help describe what is visible without becoming a property outline. Provide the team’s approved reference plan separately when readers need to connect the photograph with the property being marketed.
When the reference plan and photograph face different directions, use a clearly recognizable landmark to help readers connect them. Keep the distinction between the two materials visible. The marketing layout should make comparison easier without making an ordinary photograph appear to be a measured plan.
Explain the visible road and entrance
A closer image can show where a gravel opening meets a road, how a driveway continues into the scene, or where a gate sits relative to recognizable features. Its purpose is to explain visible geometry. Retain enough surrounding context that the reader can connect this detail to the overview.
Use precise captions. “Gravel entrance visible beside the road” describes the photograph. A statement about permitted access requires information beyond the image. Keep the wording tied to what the photograph contributes, then place any approved supporting facts in the accompanying property information.
Ask the site contact which visible entrance should be shown and whether any temporary conditions affect the planned composition. Construction equipment, parked vehicles, or seasonal vegetation may obscure the feature that matters. Give the capture team the question to answer and let it recommend feasible perspectives.

Show surroundings with useful reference points
Land marketing needs more than a close view of the ground. A broader photograph can show the relationship between an open area, surrounding roads, and nearby buildings. Choose a direction that helps explain those relationships while keeping the subject easy to recognize.
Describe neighboring features conservatively. A visible warehouse is useful context; a claim that it creates demand for the property is a different kind of statement. Keep current names and uses subject to the property team’s confirmation rather than guessing from roof shapes or signage.
Details should retain a reference point. A photograph of a tree cluster is easier to place when the adjacent road or a recognizable corner of the scene remains visible. If several close images could belong anywhere, they are adding visual variety without helping the reader understand this setting.
Separate observations, supplied facts, and open questions
Before laying out the marketing page, sort the information into three groups. The first contains visible observations: a road, an entrance, vegetation, existing structures, or the arrangement of neighboring development. These are the details the photographs can introduce.
The second contains supplied property facts, each with an identified source and someone responsible for confirming the wording. Keep these in a distinct information panel or accompanying document. Do not let a label placed on an aerial make an unverified statement appear established.
The third contains questions still requiring an answer. Record them for the property team instead of resolving them through image interpretation. A visible utility pole does not establish available capacity. Clear ground does not establish development feasibility. Ordinary aerial photographs do not verify parcel boundaries, zoning, flood conditions, or access rights.
A draft caption such as “ready-to-build acreage beside an upgraded road” mixes appearance with conclusions. Rewrite it around the visible setting, then move supported project information to the separate facts panel with the source and confirmation date. If the team cannot identify a source for part of the statement, leave that part out until it is resolved.
This separation makes the page easier to maintain. When a supplied fact changes, the team can update its information panel while preserving the original image. It also gives the broker a clear place to direct questions that the photography was never intended to answer.
Turn the approach into a practical brief
Consider a hypothetical listing with an open grassed area, a gravel entrance, scattered trees, and warehouse buildings visible beyond a nearby road. The broker wants buyers to understand the setting before arranging a visit. The brief should explain that purpose without prescribing a flight path or inventing a development story.
- Identify the subject. Supply the address or location reference, the property team’s approved reference materials, a site contact, and any names that may appear in captions.
- State the visual questions. Explain which relationships matter: the open area within its surroundings, the visible entrance beside the road, and selected details that remain easy to locate.
- Define the presentation. Name the listing page, brochure, or buyer presentation and explain how the photographs will sit beside the reference plan and supplied property information.
- Assign the review. Identify who checks image selection, captions, reference materials, and factual statements, with enough time to resolve unclear wording before publication.
Up Sonder’s aerial photography options include edited property and surrounding-area views. Discuss the intended subject, requested perspectives, and timing before booking. If the presentation also needs ground photography or other work, include that in the scope discussion rather than assuming it accompanies the aerial assignment.
Review the page as a buyer would encounter it
Open the finished page without the working brief. Start with the overview, then follow the details. Can a reader reconnect each photograph to the broader scene? Are road names consistent? Does the reference plan remain clearly separate from the unmarked photography?
Ask a colleague unfamiliar with the listing to identify the main subject and describe the surrounding scene. If they need a lengthy verbal explanation, revise the selection or captions before adding more images.
Check the actual mobile layout as well as the desktop version. A crop that removes the road may eliminate the reference point that made the detail useful. Keep clean original files available so the designer can adjust framing without rebuilding the presentation from a labeled export.
Bring Up Sonder the property location, reference materials, intended audience, and publication deadline. Share your project details to discuss a suitable aerial assignment. The result should give buyers a clear sense of place and give the broker a disciplined foundation for the next conversation.